Virtual Remodeler
Design Tools - GAF Virtual Remodeler Quick Start Guide
There are some amazing free tools available to help a homeowner decide what shingles are the best fit for their home. GAF offers their VirtualRemodeler to help you see what various shingles will look like on your home.
This is a basic introduction and guide for the VirtualRemodeler, so let’s get to it!
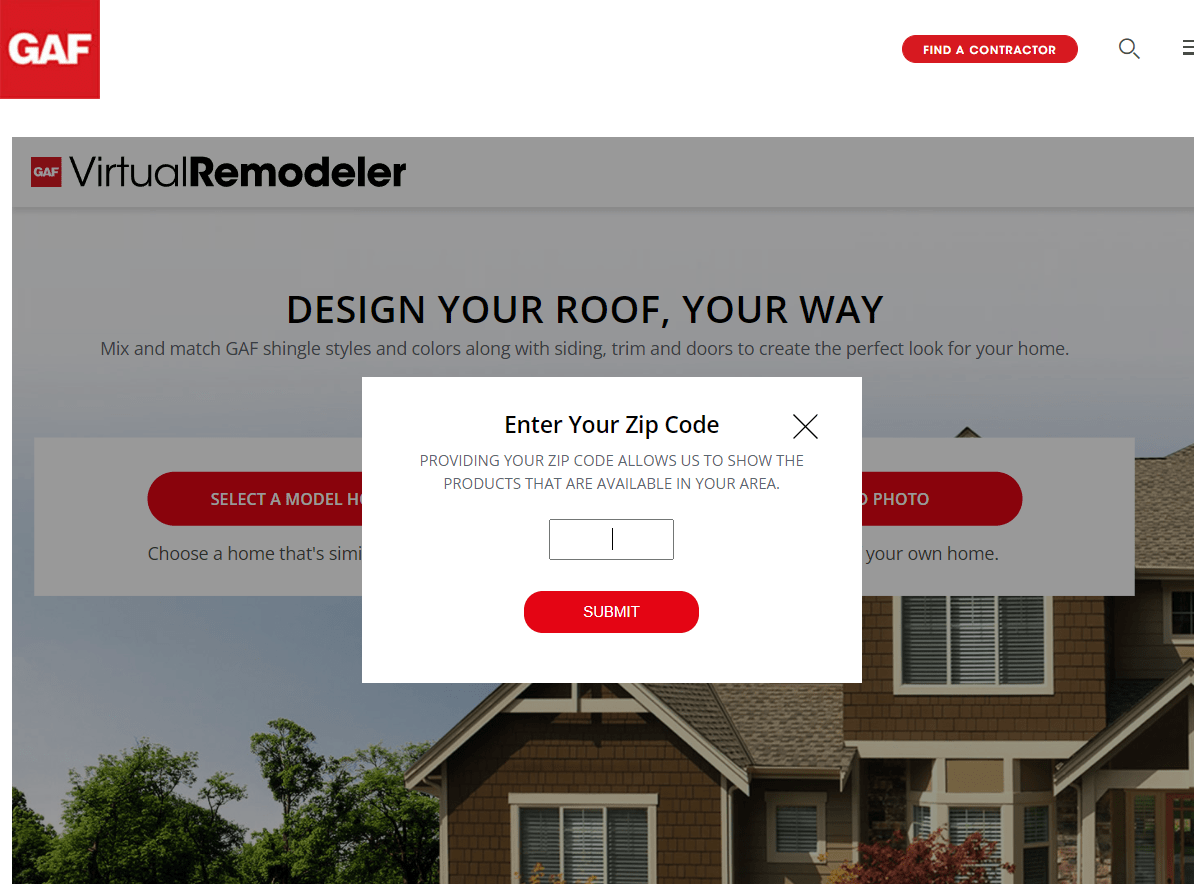
First visit, enter your zip code.
The first time you visit the GAF VirtualRemodeler page (https://www.gaf.com/en-us/roof-design/gaf-home-remodeler), you will be asked to enter your zip code so that the VirtualRemodeler can be populated with products available in your area. This is a necessary part of the process, because not all shingles are available in all areas. If there is a shingle that you would like to use that GAF does not show as available in your area, it is good to know that as early as possible, so that your contractor can make arrangements to find that shingle for you. So, the first step is to enter your zip code.
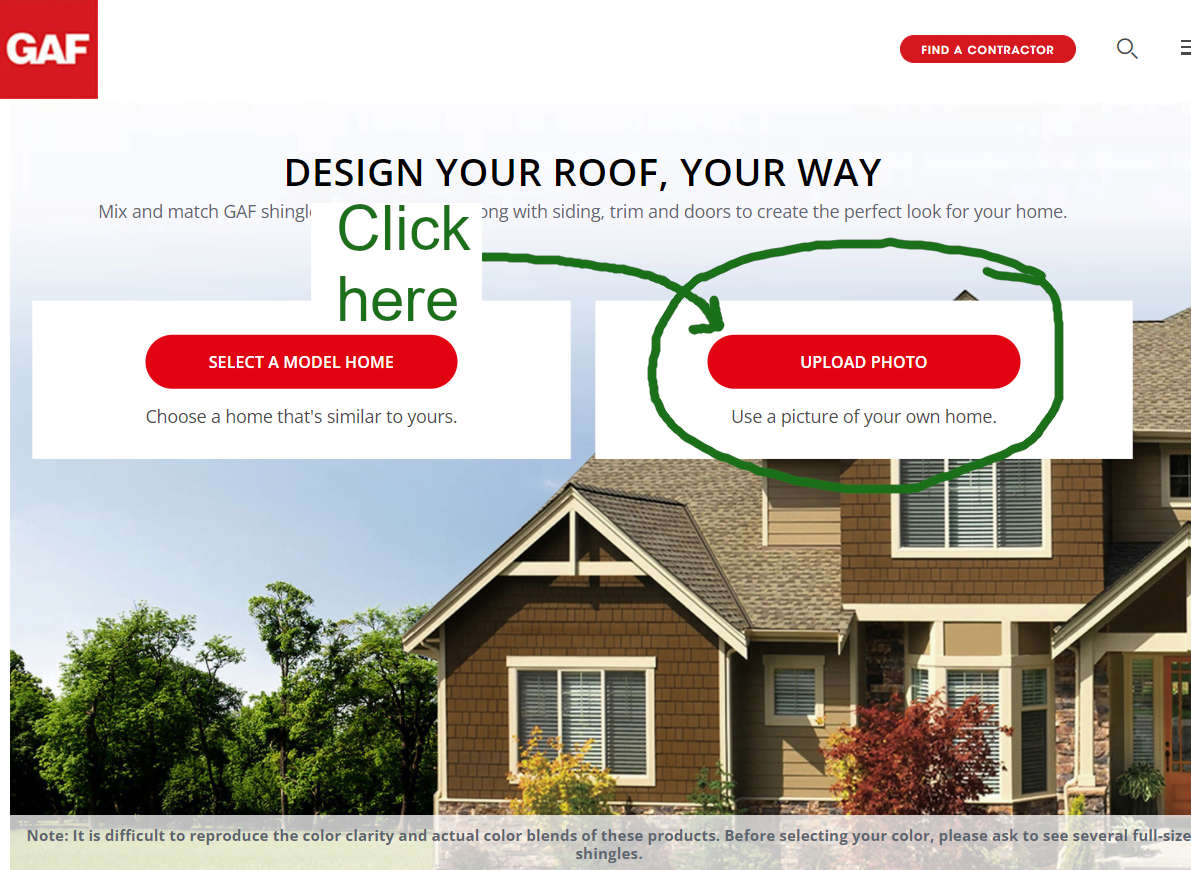
Upload a pic of your home
You can use the remodeler in two ways:
1. Use one of the pre-loaded model homes that is similar to your elevation to see how different shingles will look, or
2. Upload a pic of your own home.
Uploading a pic of your own home will give you a much better idea of how a particular shingle will look on your home, based one your exact exterior paint colors, shade, and landscaping. For this guide, we are going click the ‘Upload Photo’ button and walk through the steps that follow.
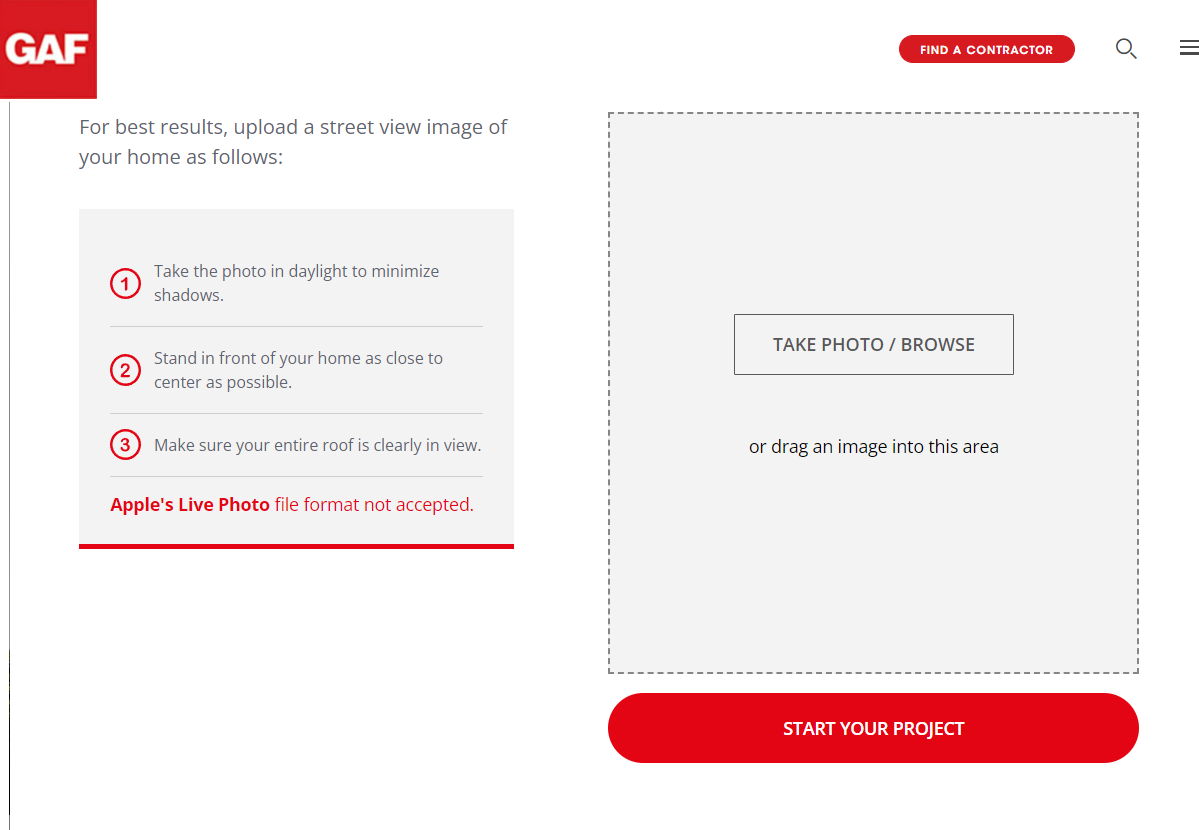
Photo upload page
The instructions on this page are fairly straightforward. When it says ‘make sure your entire roof is clearly in view’, it means to get the whole side of the house, top-to-bottom, end-to-end, in the pic.
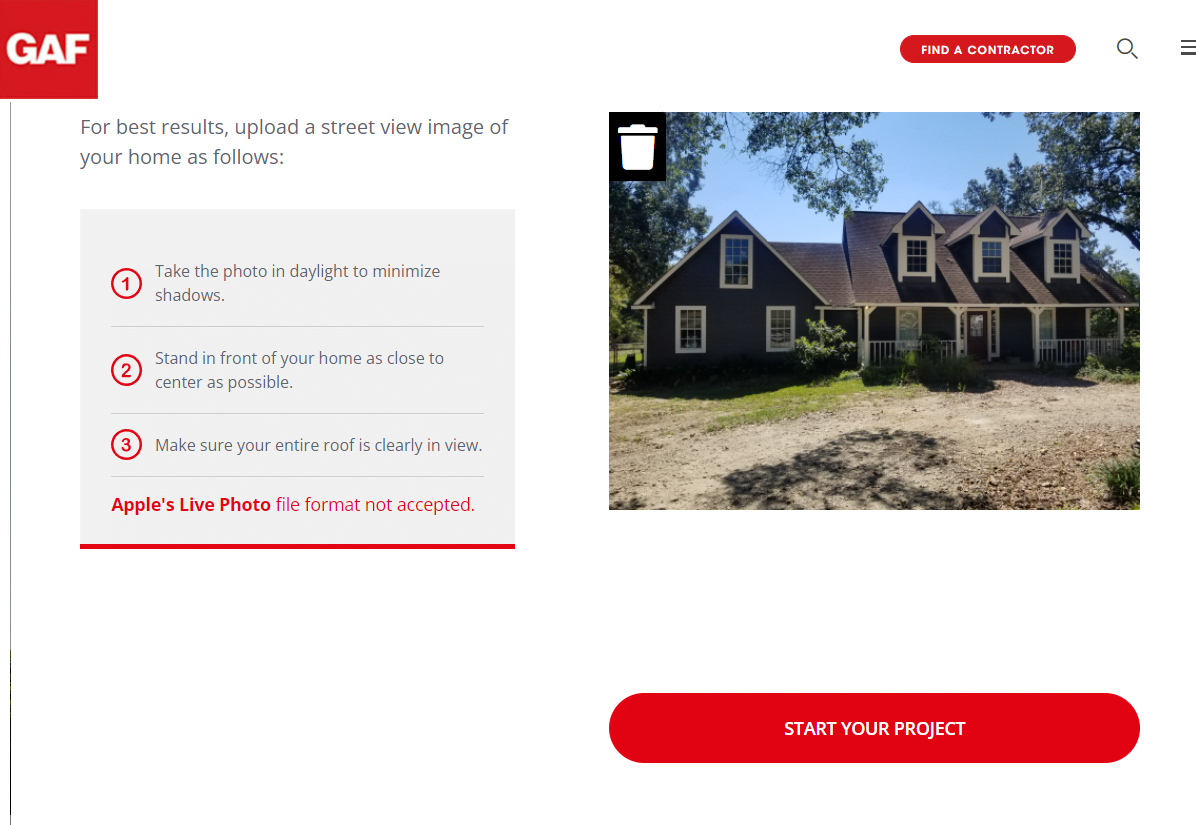
Photo is uploaded
Once you select a pic or drag it into the upload block, the remodeler will show you a preview so that you can see if your pic is going to work. If it is too close to see the whole side elevation, or doesn’t work one reason or another, no worries. Just click the trash can at the top left of the pic and upload another one.
Once you are satisfied with the pic, click on the ‘Start Your Project’ button to really get the party started.

Time to pick a shingle!!
The shingles menu on the left will show you the various shingles collections to begin with.
P91 uses the Timberline HDZ collection quite a bit, so we will select that collection for this example.
Once you pick a collection, the Remodeler shows you the various colors available in your area.
We picked the Slate color, and the Remodeler automatically fills in the roof space in our elevation with that shingle! You can select various colors to get a feel for what will look the best on your house.
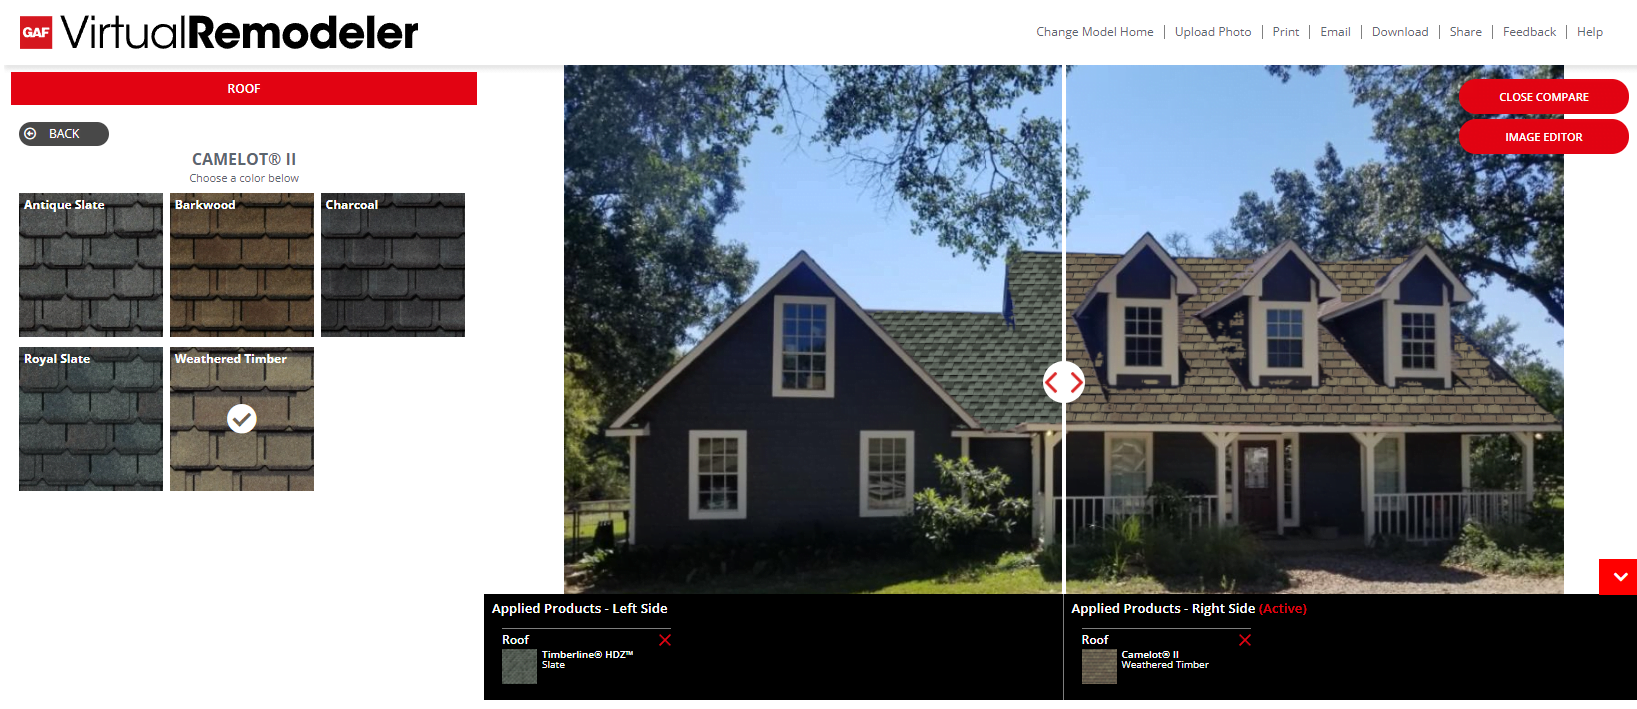
Side-by-side comparisons
Another very cool feature that the Remodeler offers is the ability to compare two different shingles side by side. They can even be from different collections! The pic above shows the Slate Timberline HDZ on the left side and the Camelot II Weathered Timber on the right side.
To do the comparison, you have to select a single shingle like we did in the step above where we picked our Slate Timberline HDZ shingle, and after the Remodeler loads that shingle onto your roof, you will see a Compare button at the top right of your image pane, right above the Image Editor button. The Compare button does not show before you make an initial shingle selection, so you have to have one shingle loaded on your roof before the Compare button will be available.
Once you have done a comparison, you can go back to a single shingle display by clicking the Close Compare button, which is on the top right of the preview pane.
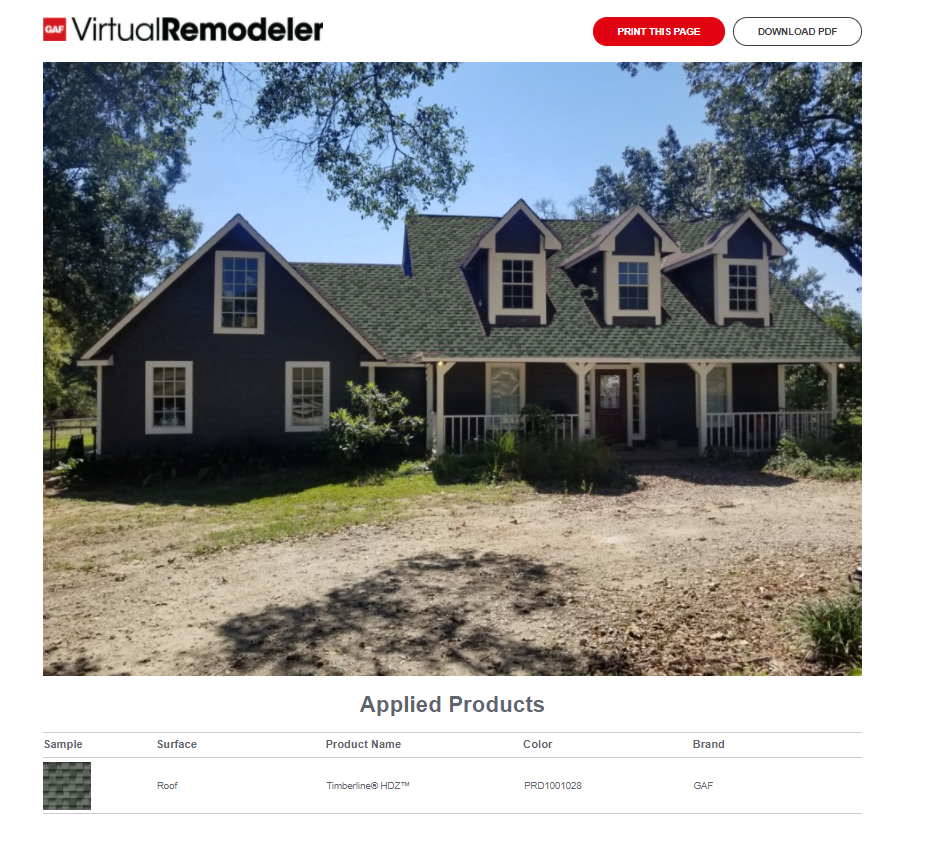
Print or Download your remodel
Once you get your shingles picked out, you can either print or dowload your remodel report, or both. The Remodeler will give you the option to download a pdf and/or print the report. The report has all the info you need to give your roofer so that they can get the right shingles ordered for you.
This is the last essential section of this guide, the additional sections below are for those who might need to adjust their roof outline or get into more advanced VirtualRemodeler features.
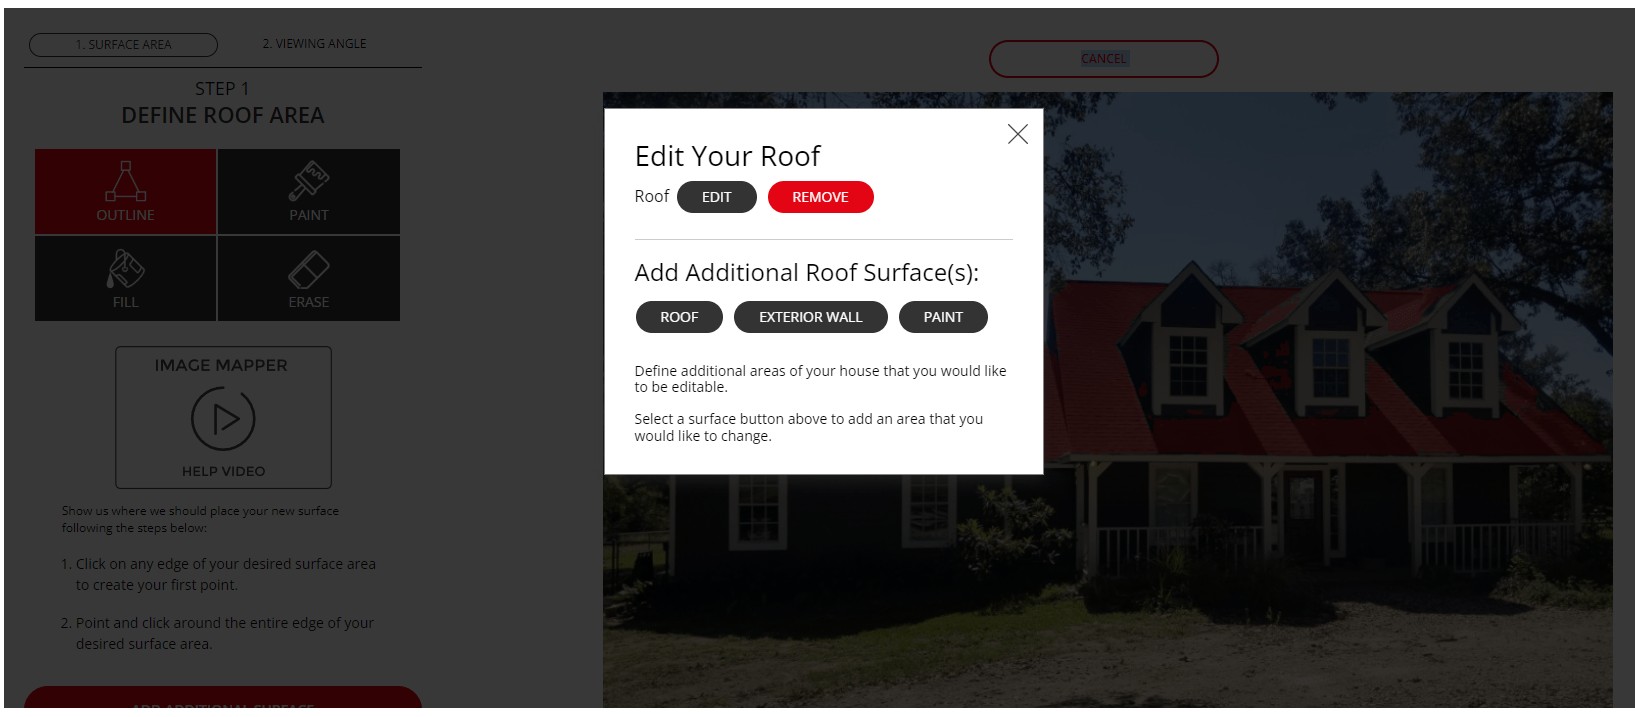
Image Editor button
The Image Editor is a very powerful tool that the VirtualRemodeler uses to let you modify your roof outline if it does not load exactly like it should, or even change the paint color on your exterior walls if you want! Changing the wall color is a bit outside the scope of this howto, but we are going to look at how to clean up your roof outline, just in case the software did not load it exactly right because of a shadow or something.
Clicking on the Image Editor button in the top right of the preview pane brings up a menu as seen above. We are going to click on the Edit button next to Roof.
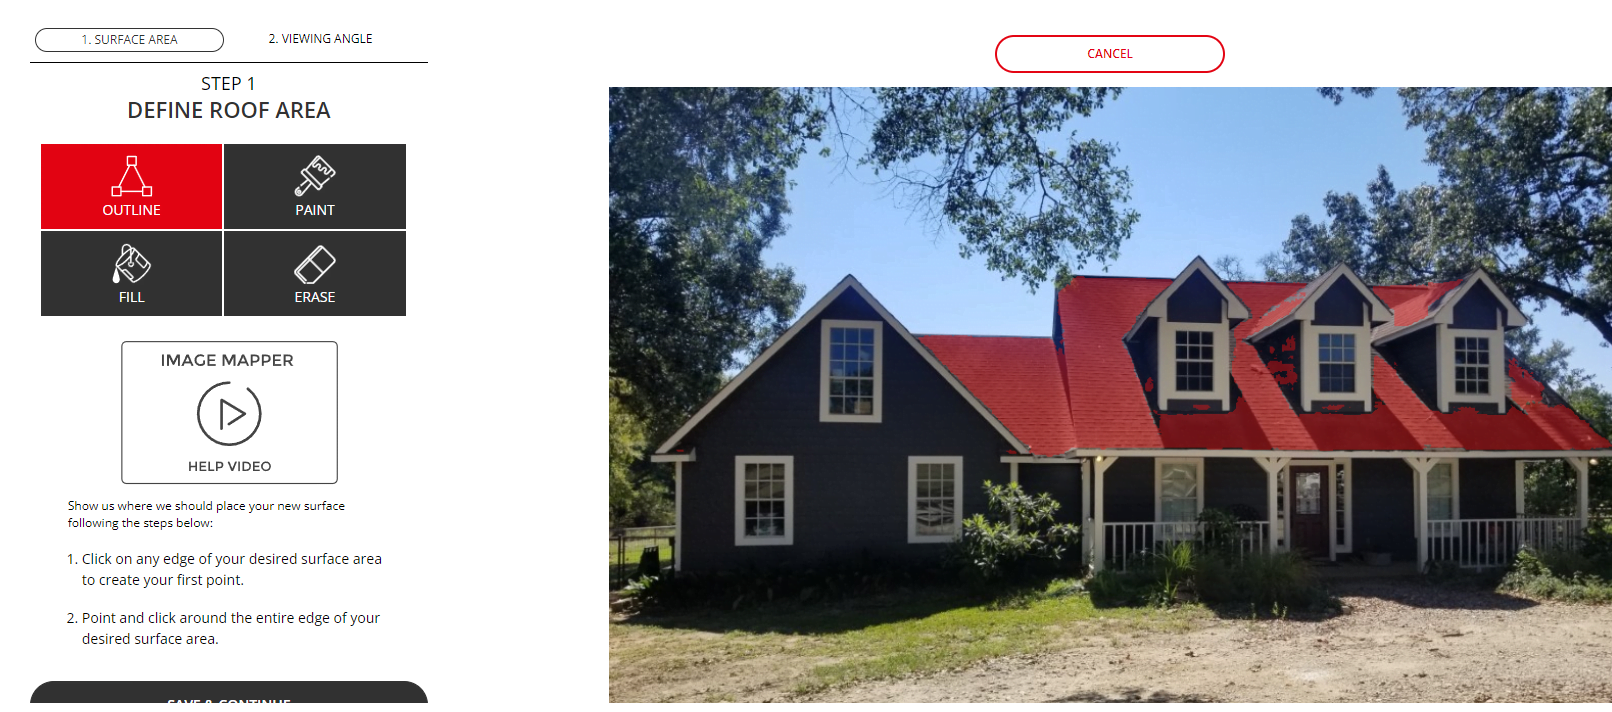
Define roof area
This brings up our roof elevation with the roof area already recognized by the software highlighted in red. You can see in some of the shadowed areas of the roof on the right side that the software did not recognize the correct roof outline, so we will fix that with the outline tool.
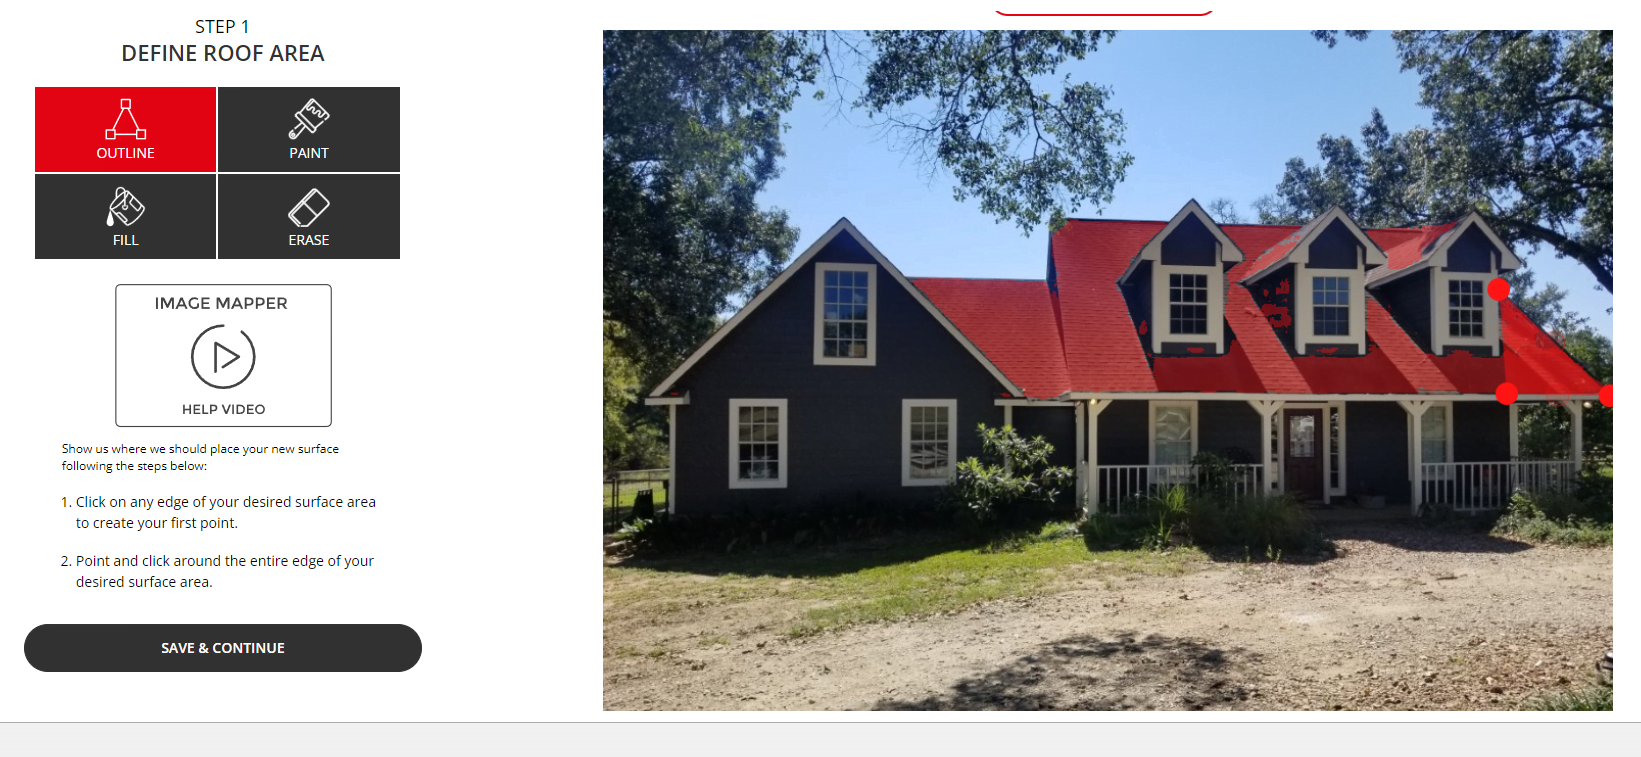
Outline area to fix
Click on the first corner of the area you want to fix, and then move to the next corner and click on it, you will get a drag-fill area to help you select your last corner. Cover the area you need to fix, and click on your last corner. Then click Save and Continue on the bottom left.
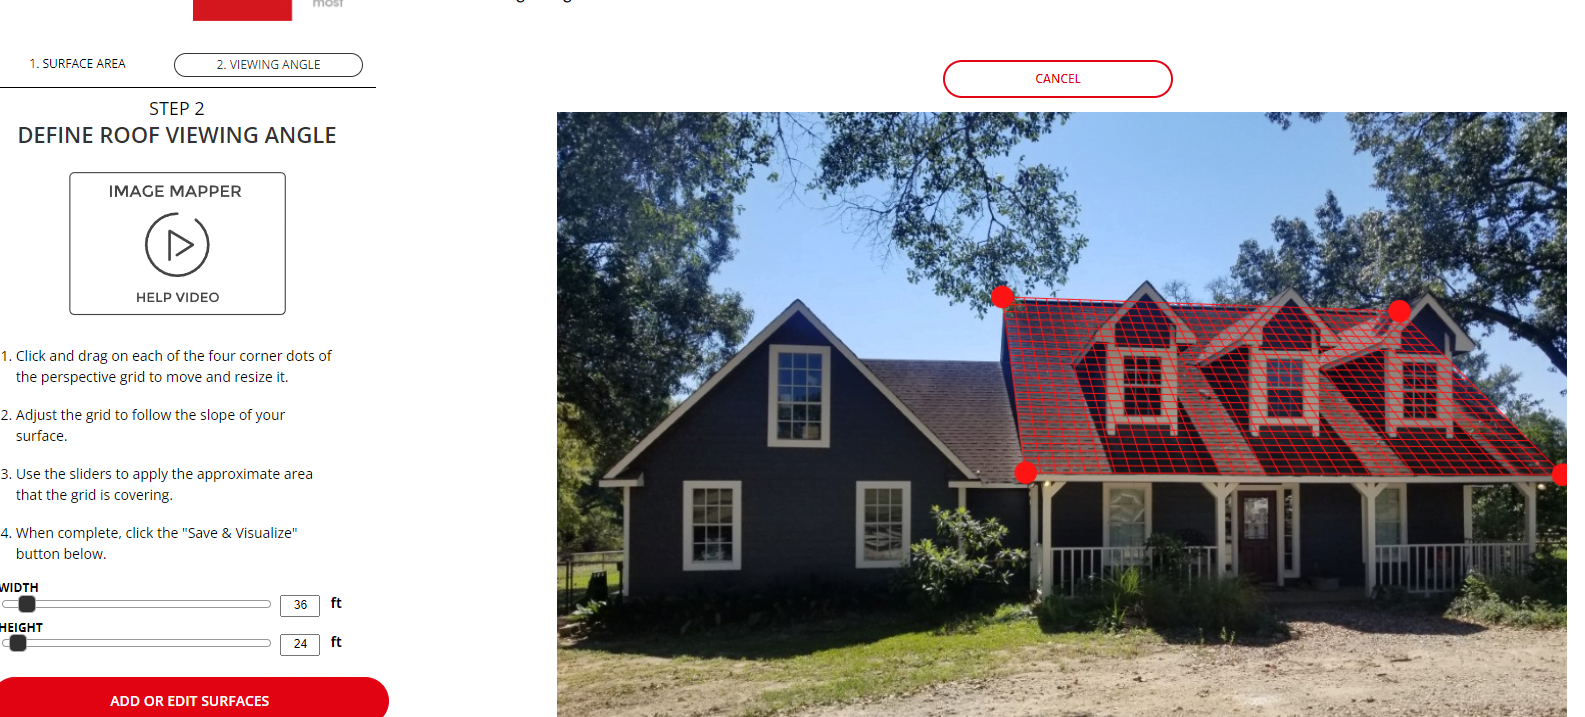
Set the perspective angle
The next variable to set is the perspective angle. Drag the corner markers to the corners of your roof slope to set the grid. Once you have that grid set properly, click the Save & Visualize button on the bottom left.
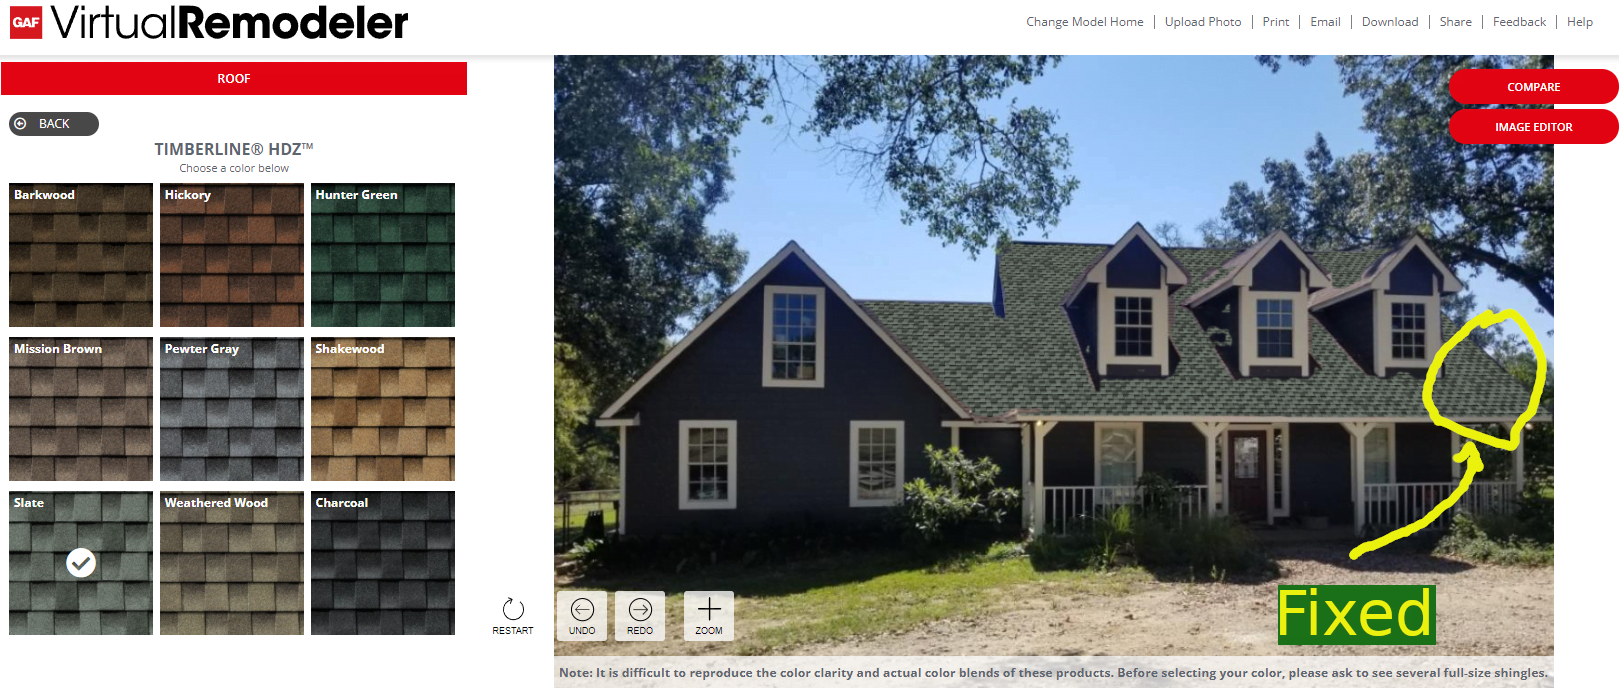
Roof section fixed!
Voila! The small section on the right side of the roof that was not initially recognized by the Remodeler software is now seamlessly included in the roof area.
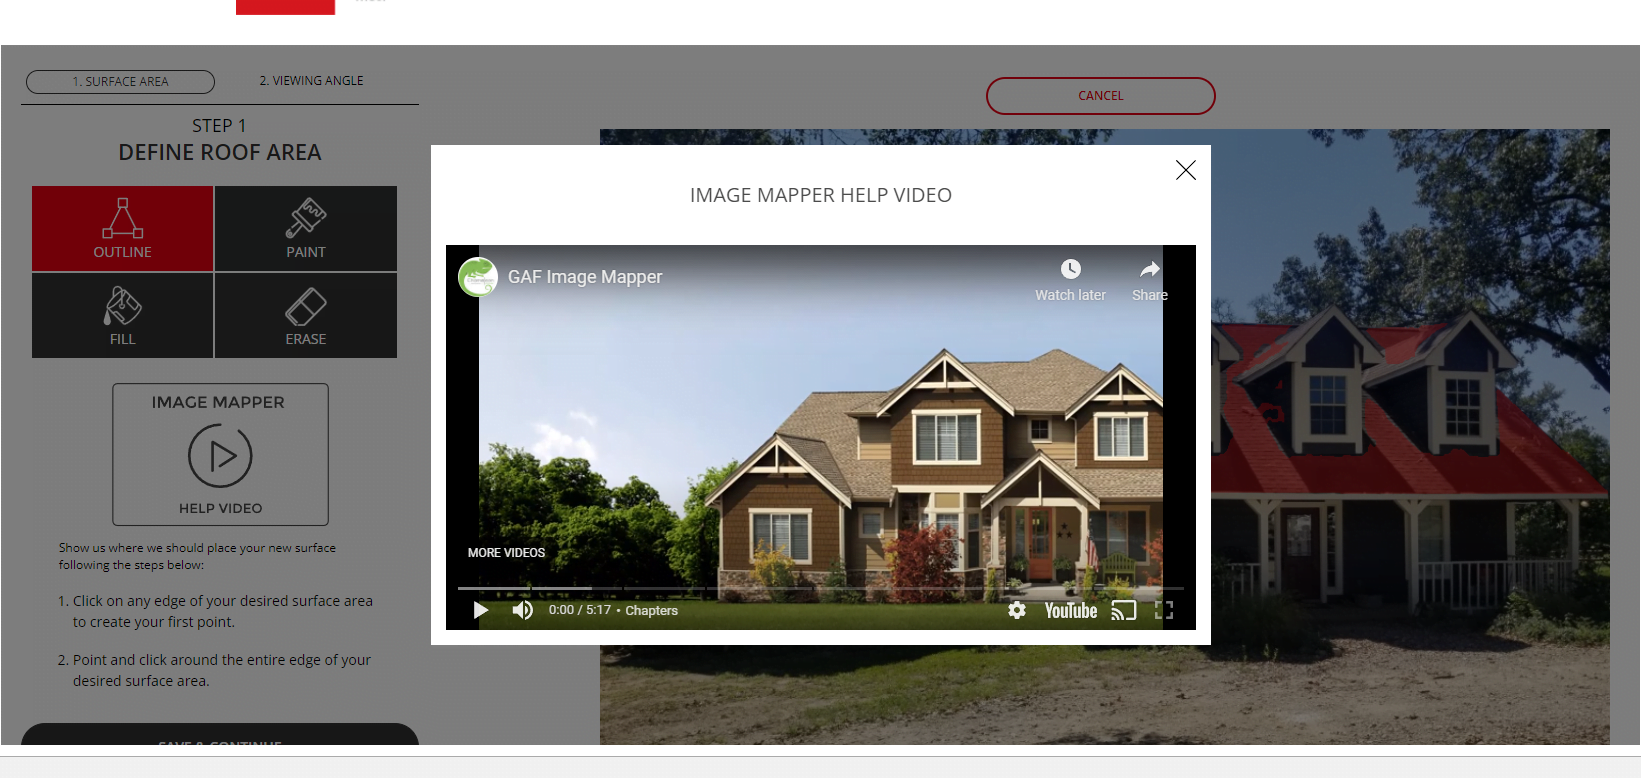
Image Mapper help video
The Image Mapper help video is a great tutorial to helpyou get the most out of the Image Editor. If you want to see what your home would look like with a different exterior paint and shingle combo, watching this video will help you make the adjustments in the Remodeler quickly and efficiently. Props to GAF for making it all so easily available, for free!
Excellent Customer SErvice
Our customers appreciate our honest approach to business, helping them find cost-effective solutions to roof repair and replacement, and a product that is backed by a local family business that is here to stay.
Top Quality Services
Our crews do hundreds of jobs each year, working with homeowners and their insurance companies, who then refer us to their friends and their families to protect their most valuable investments—their family and their home.
P91 Roofing
1400 Graham Dr. Ste B #194
Tomball, TX 77375
Contact Us
chris@p91roofing.com
(281) 948-2208
Hours
Office: 8am - 6pm M-F